YES Funnel API
Build automations with your funnel data
The YES Funnel API lets you access your funnels, leads, and analytics programmatically. Use it to connect with Zapier, ActivePieces, Make, n8n, or build custom integrations.
Base URL: https://theyesfunnel.com/api/v1
Authentication: Bearer token
Format: JSON
Authentication
All API requests require an API key in the Authorization header.
curl -X GET https://theyesfunnel.com/api/v1/funnels \
  -H "Authorization: Bearer yes_live_abc123..."
Error responses
| Status | Meaning |
|---|---|
401 | Missing or invalid API key |
403 | Plan does not include API access |
Example error response
{
  "error": "Missing or invalid API key"
}
Funnels API
List all your funnels
Example request
curl -X GET https://theyesfunnel.com/api/v1/funnels \
  -H "Authorization: Bearer YOUR_KEY"
Example response
{
  "data": [
    {
      "id": 1,
      "name": "PI Injury Quiz",
      "slug": "pi-injury-quiz",
      "published": true,
      "lead_count": 47,
      "created_at": "2024-01-15T10:00:00Z",
      "url": "https://theyesfunnel.com/f/pi-injury-quiz"
    }
  ],
  "meta": {
    "total": 1,
    "plan": "pro"
  }
}
Get a single funnel. Same format as above, includes a steps array.
Leads API
Get leads for a funnel
Query parameters
| Param | Type | Values | Description |
|---|---|---|---|
since | string | ISO date | Filter by date |
limit | number | 1 to 1000 | Default 100 |
page | number | Pagination |
Example response
{
  "data": [
    {
      "id": 123,
      "submitted_at": "2024-01-15T14:30:00Z",
      "answers": {
        "_name": "John Doe",
        "_email": "john@email.com",
        "_phone": "+1 555 000 0000",
        "_score": 80,
        "_grade": "Excellent",
        "q1": "Car Accident",
        "q2": "Less than 6 months ago"
      }
    }
  ],
  "meta": {
    "total": 47,
    "page": 1,
    "pages": 1
  }
}
Get all leads across all your funnels. Same query parameters as above.
Manually submit a lead
Body: { "answers": {} }
Analytics API
Get analytics summary. Returns views, leads, conversion, and step dropoff data.
Example response
{
  "data": {
    "funnel_id": 1,
    "views": 240,
    "leads": 47,
    "conversion": 19.6,
    "step_dropoff": [
      {
        "step_index": 0,
        "step_name": "Step 1",
        "count": 240,
        "percent": 100
      },
      {
        "step_index": 1,
        "step_name": "Step 2",
        "count": 180,
        "percent": 75
      }
    ]
  }
}
Webhooks
Webhooks send lead data to your URL instantly when a form is submitted. Set the webhook URL per funnel in the funnel builder under Settings Integrations.
Webhook payload example
{
  "event": "lead.created",
  "funnel_id": 1,
  "funnel_name": "PI Injury Quiz",
  "funnel_url": "https://theyesfunnel.com/f/pi-injury-quiz",
  "lead": {
    "id": 123,
    "submitted_at": "2024-01-15T14:30:00Z",
    "name": "John Doe",
    "email": "john@email.com",
    "phone": "+1 555 000 0000",
    "score": 80,
    "grade": "Excellent",
    "answers": {
      "q1": "Car Accident",
      "q2": "Less than 6 months ago"
    },
    "custom": {}
  }
}
Each webhook includes the header:
X-YesFunnel-Event: lead.created
X-YesFunnel-Funnel-Id: 1
Retry policy: Webhooks are sent once. If your endpoint is down the lead is still saved in YES Funnel.
Connecting Zapier
Create a Zap
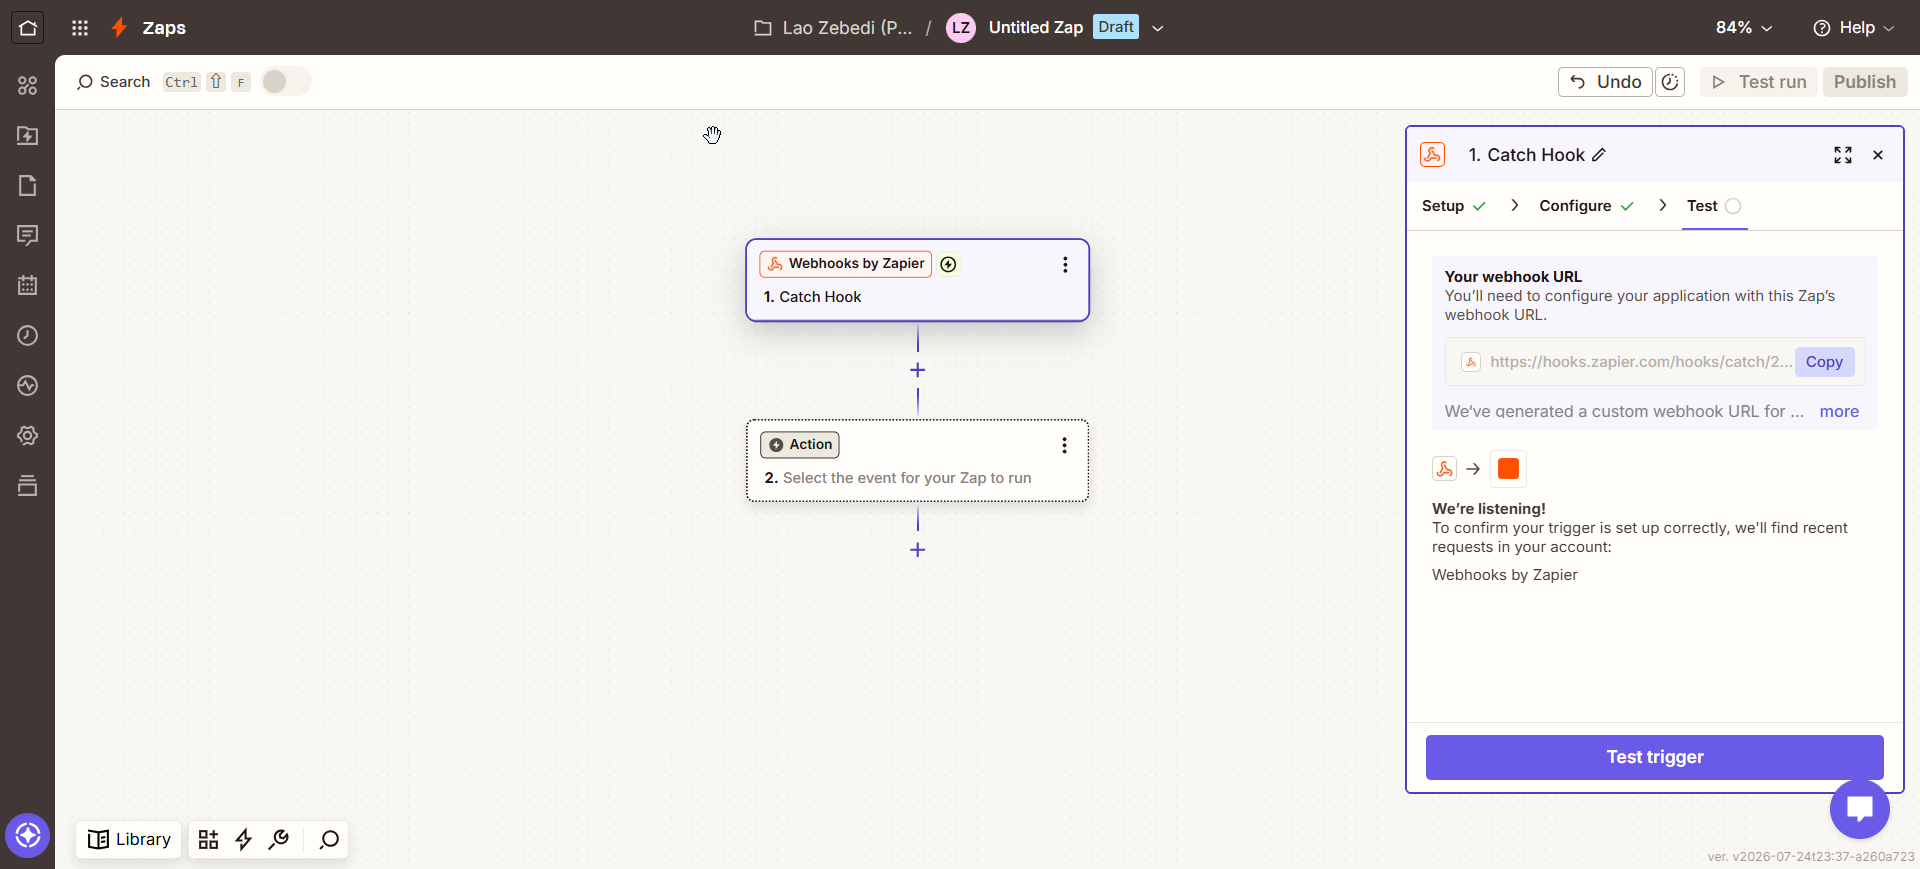
In Zapier, create a new Zap. Choose Webhooks by Zapier as the trigger. Select Catch Hook. Zapier generates a webhook URL for you here.
Paste it into your webhook URL field
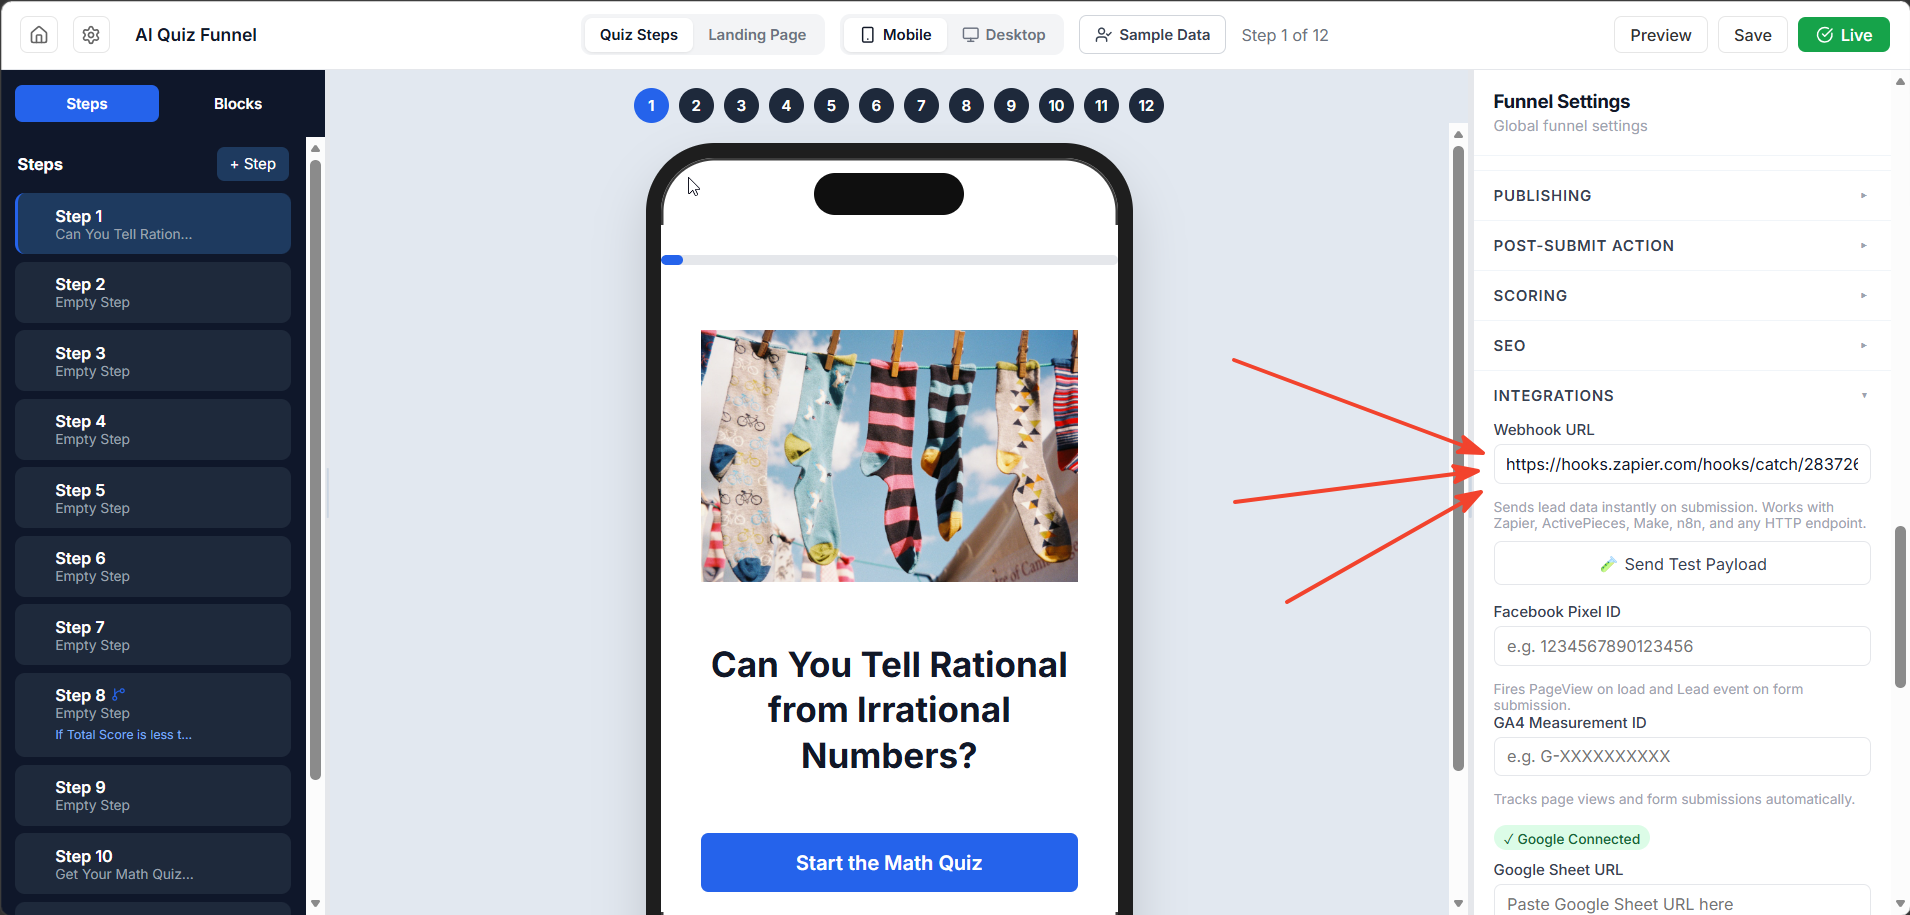
Copy the URL Zapier generated, then in your funnel builder go to Settings Integrations Webhook URL and paste it in there.
Test the connection
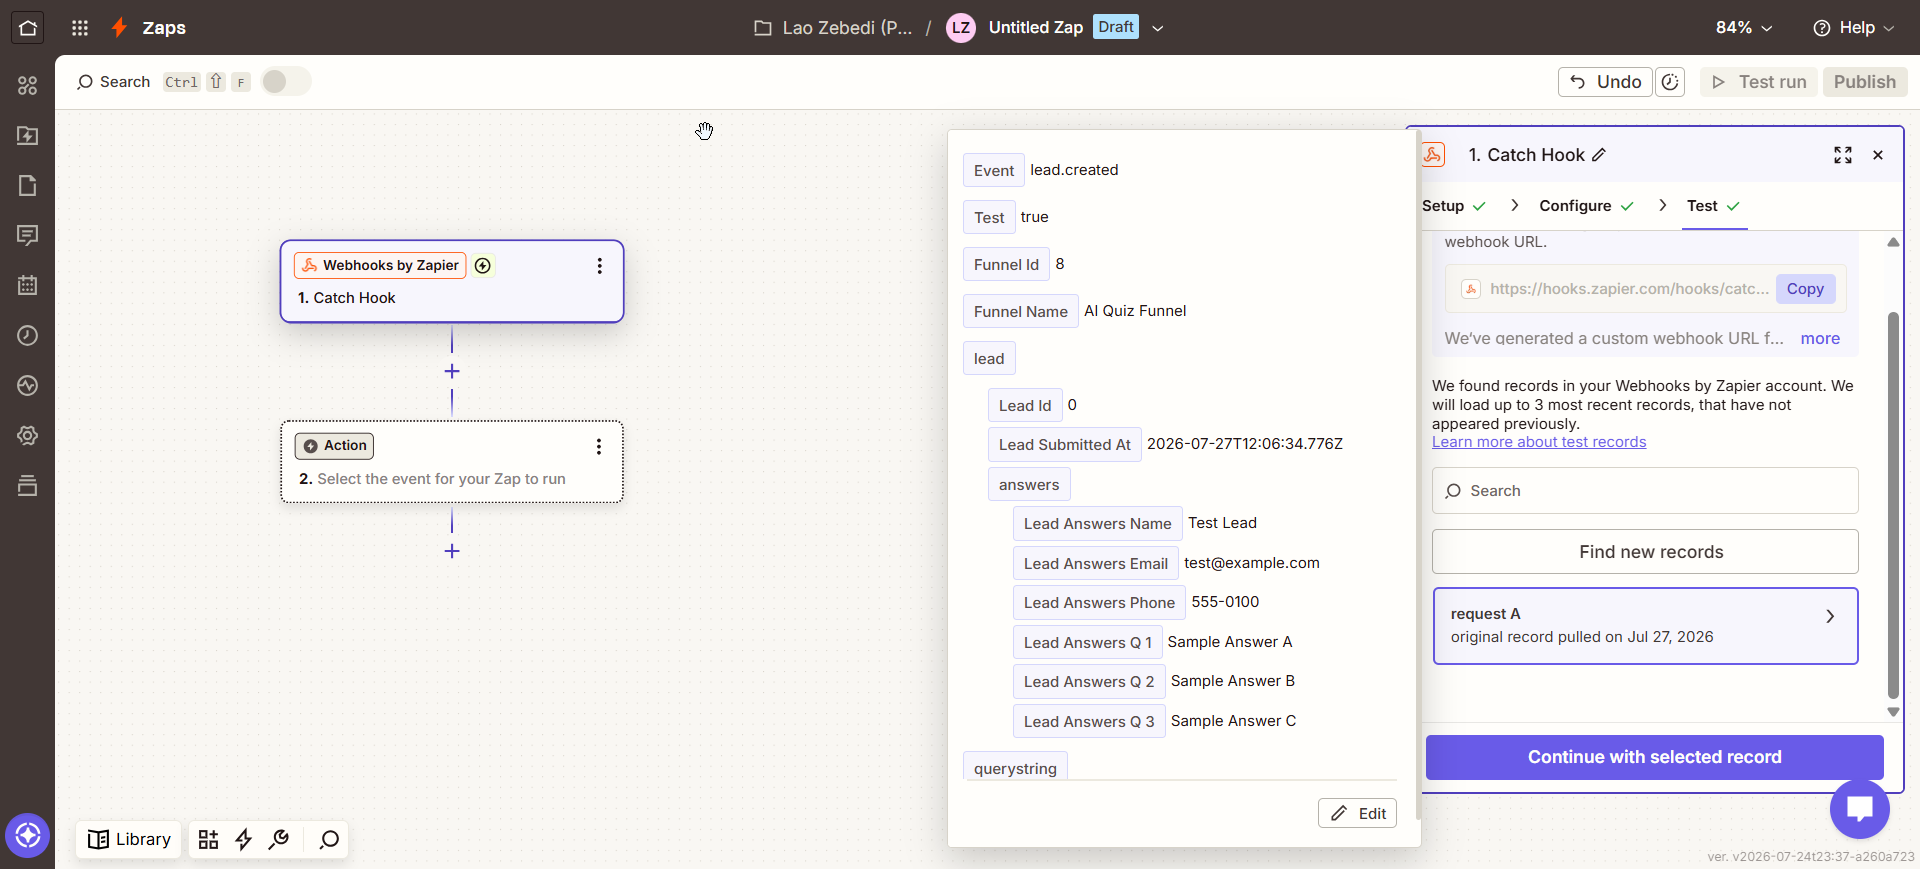
Use the Send Test Payload button in your funnel settings to send a sample lead. Zapier will detect the data structure.
Map your fields
You can now use any lead field in your Zap actions:
{{lead.name}}{{lead.email}}{{lead.phone}}{{lead.score}}{{lead.answers.q1}}
Add your action
Connect to Gmail, Google Sheets, Slack, CRM, or any of Zapier's 5,000+ apps.
Common Zap examples
- New lead Add row to Google Sheets
- New lead Send email via Gmail
- New lead Create contact in HubSpot
- New lead Send Slack message
- New lead Add to Mailchimp list
Connecting ActivePieces
Create a flow
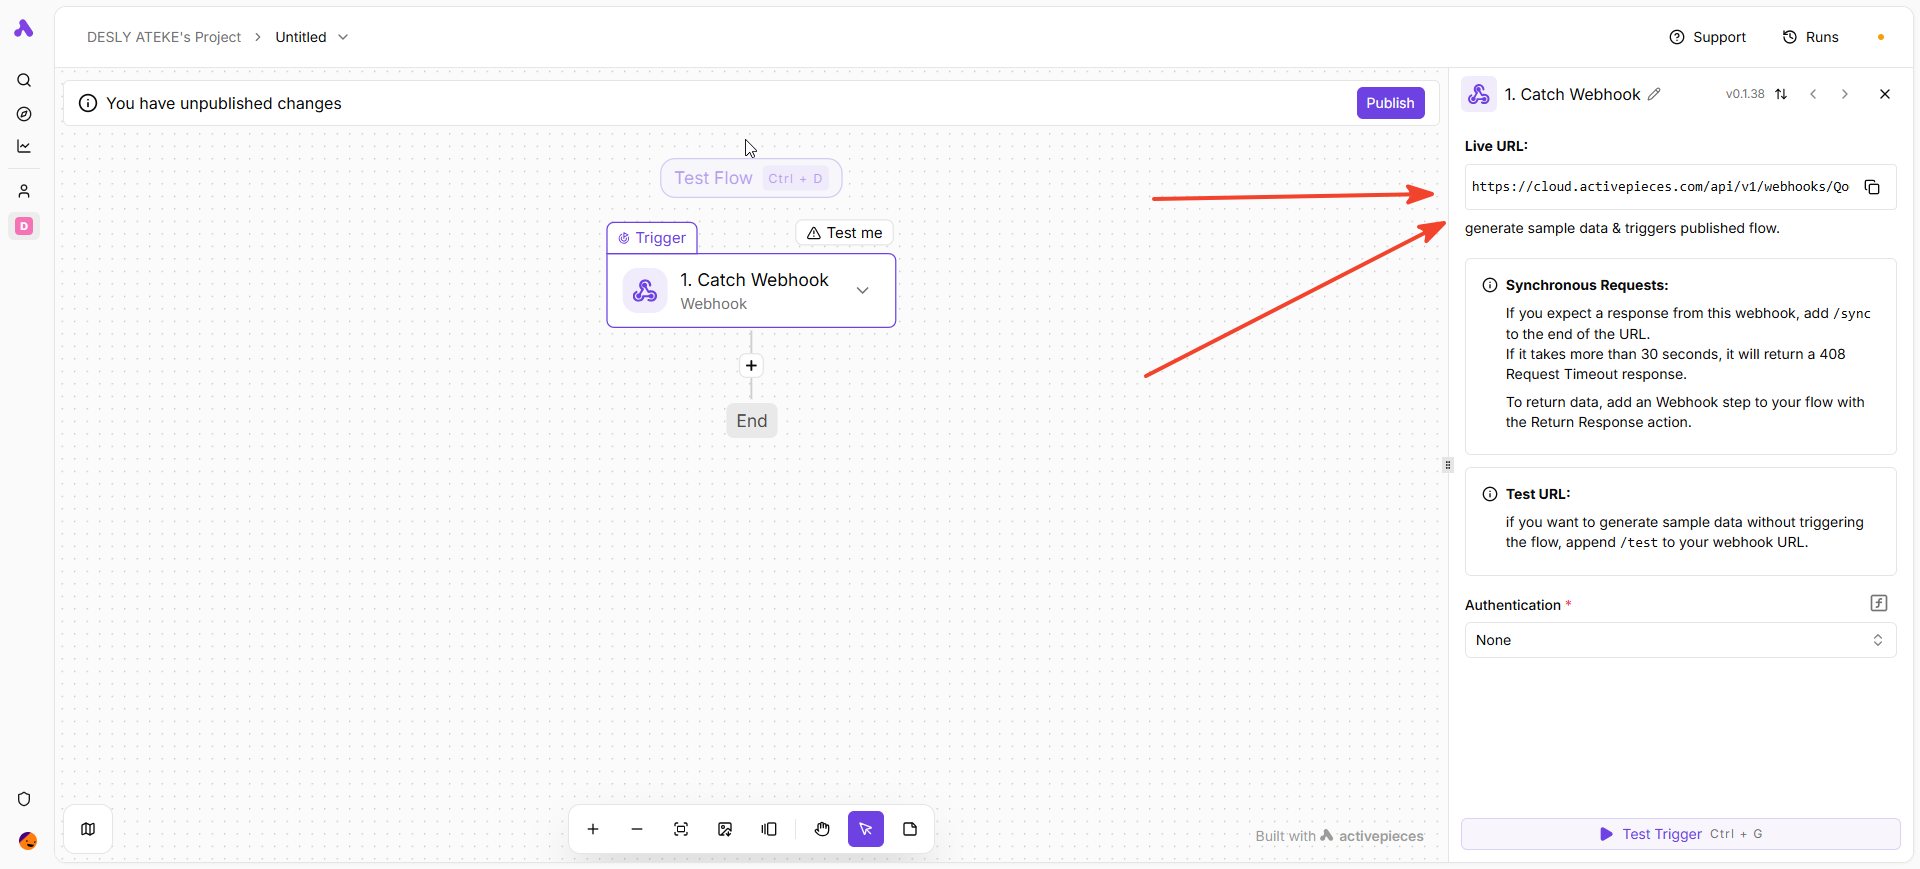
In ActivePieces, create a new flow. Choose Webhook as the trigger. ActivePieces generates a Live URL for you here.
Paste it into your webhook URL field
Copy the Live URL ActivePieces generated, then in your funnel builder go to Settings Integrations Webhook URL and paste it in there.
Or pull data instead of receiving it
Prefer to fetch on a schedule rather than receive a push? Skip the webhook and use ActivePieces' HTTP Request piece to call the API directly with the config below.
Example ActivePieces flow config
Method: GET
URL: https://theyesfunnel.com/api/v1/funnels/1/leads
Headers:
  Authorization: Bearer YOUR_API_KEY
Content-Type: application/jsonAdd your action
Connect the response fields to any downstream ActivePieces piece: CRM, spreadsheet, email, or Slack.
Connecting Make (formerly Integromat)
Create a scenario
In Make, create a new scenario. Add a Webhooks module and select Custom webhook. Make generates a webhook URL for you here.
Paste it into your webhook URL field
Copy the URL Make generated, then in your funnel builder go to Settings Integrations Webhook URL and paste it in there. Leads will now arrive instantly. Prefer to pull data on a schedule instead? Skip this and use an HTTP module to call the API directly.
Example Make HTTP module config
Method: GET
URL: https://theyesfunnel.com/api/v1/funnels/1/leads
Headers:
  Authorization: Bearer YOUR_API_KEY
Content-Type: application/jsonMap the response
Parse the JSON response and map data[].answers fields into your next module: CRM, spreadsheet, or notification.